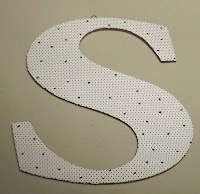
I don't recall seeing this on Pinterest, but if I did and the author of the blog or whatever that originally came up with this happens to run across this post, I apologize if it seems as though I am taking this and claiming it as my own. I actually think that it is a combination of several pins.
I purchased the things needed to make these at Craft Warehouse, but I would assume that other places like Michael's and JoAnn would have them too. To make them you will need:
------------------------------
Unpainted MDF LettersScrapbook paper (one for every letter unless using smaller letters)
Adhesive Spray
X-acto Knife
Rhinestones
Tacky Glue (or something similar)
Toothpick
Picture Hangers (I used ones that were referred to as "Triangular Hangers.")
Hot Glue Gun
Newspaper (to keep your work surface clean)
Large, heavy book (I used "Munschworks" since it was nearby.)
Lay out the newspaper over your work surface so it doesn't get all sticky from the spray.
Spray the letter with a good coating of Adhesive Spray. Also spray the wrong side (the side that you do not want showing) of the scrapbook paper lightly.
Place the letter on the paper sticky side down. On top of this, place a sheet of newspaper and your heavy book. (You probably don't need the sheet of newspaper, but I did it to be safe so that my book would not accidentally stick to my letter.)
Let the letter set for a few minutes until the letter is dry.
Once the letter is dry, turn it paper side down on your work surface. Using the X-acto Knife, cut out around the edges of the letter.
After cutting around the edges of the letter, flip over and use the X-acto Knife to cut all the way through the paper.
Arrange the rhinestones on the letter however you would like (arrange without glue first so you don't make a commitment until you are sure you like where they are all placed).
Using a toothpick, place small drops of glue where you would like to place the rhinestones. (I found that the easiest way to pick up the rhinestones is to lick your finger and then press down on the rhinestone.)
Allow the Tacky Glue to completely dry (I left mine overnight.)
Using a hot glue gun, attach the picture hangers to the back of your letters. (My letters had plastic hanger thingies on them for when they were in the store that I had removed before working with them; this is where I attached my picture hangers.)
Hang up your letters and enjoy!
Note: The instructions for how to attach the paper to the letters go along with the directions on my can of Adhesive Spray. You may want to check your can to make sure that they are the same.


No comments:
Post a Comment